Today is a great day! I finally finished my bathroom remodel!
Background
I bought a “fixer-upper” house in 2017 and have been slowly making changes. The house was built in 1987, with still mostly original features and the previous owners were smokers. Due to the poor/gross condition of nearly everything, I have a lot more work to do. So far, most of the work has been completed by just me. I still have the primary bathroom and bedroom, roof/solar, HVAC, kitchen/living room, and backyard/landscaping left to do. I have completed: new garage door, new windows, new interior doors, removed a wall, and painting bedrooms (the bedrooms were in pretty good shape, with flooring that doesn’t need replaced).
Many people ask me how I learned to do all of this. Well, it starts by knowing I have been watching home improvement shows for as long as I can remember. Really! I was super intrigued by Joanna “Jojo” Liebeler on the TV series Hometime. It’s my first memory of seeing a woman working in a “man’s world”. It definitely inspired me and subconsciously helped let me feel confident enough to begin a career in Information Technology. I also come from a “handy family”. As rural Appalachians and generational farmers, the “do-it-yourself” mentally was often necessary for survival. Everyone in my family does something for themselves, such as home repairs, sewing, welding, baking, etc. For specifics and current knowledge (building code does change, new products come out, etc.), I used YouTube. I can’t possibly list every video I watched, but here are the main channels I referenced or found inspiring as fellow makers:
- https://www.youtube.com/@HomeRenoVisionDIY
- https://www.youtube.com/@REALITYRENOVISION
- https://www.youtube.com/@StudPack
- https://www.youtube.com/@seejanedrill
- https://www.youtube.com/@SparkyChannel
- https://www.youtube.com/@InsiderCarpentry
- https://www.youtube.com/@TheFunnyCarpenter
- https://www.youtube.com/@PaulPeck
- https://www.youtube.com/@TileCoach
- https://www.youtube.com/@thisoldhouse
- https://www.youtube.com/@nevertoosmall
- https://www.youtube.com/@DrewBuildsStuff
- https://www.youtube.com/@EvanAndKatelyn
- https://www.youtube.com/@laurakampf
- https://www.youtube.com/@simonegiertz
- https://www.youtube.com/@MarkRober
- https://www.youtube.com/@newyankeeworkshop
Now on to the bathroom!
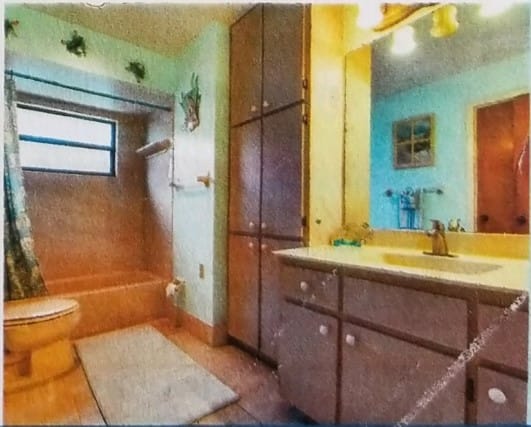
I wasn’t planning on revamping the guest bathroom at the time, but when my Dad came to visit I discovered the hot water wasn’t working in the shower. A quick diagnosis showed something wrong with the valve, which meant taking some of the wall off to fix. (For other bathroom installers out there: please leave plenty of space for servicing the value when you build a tub and/or shower!) Since it was the guest bathroom, it was not a priority. But then 2020 arrived, and with it a loss of normal activities due to the COVID-19 pandemic. I decided, more on a whim, to start demolition on the bathroom on Memorial Day weekend 2020. I didn’t have any real plans, because I wasn’t sure what kind of bones I was dealing with yet. I had another bathroom, the primary bathroom, which gave myself an open timetable. All I knew is that I wanted to move the toilet and take advantage of the unique wall layout. I also did not like the large amount storage being inside the bathroom. It made it impossible to access if someone was using the bathroom. Also, the two doors for the bathroom being so close together were awkward, so I was thinking a pocket door would work better. Those were really my only 4 wishes/requirements:
- move toilet
- use the layout better
- figure out storage
- pocket door
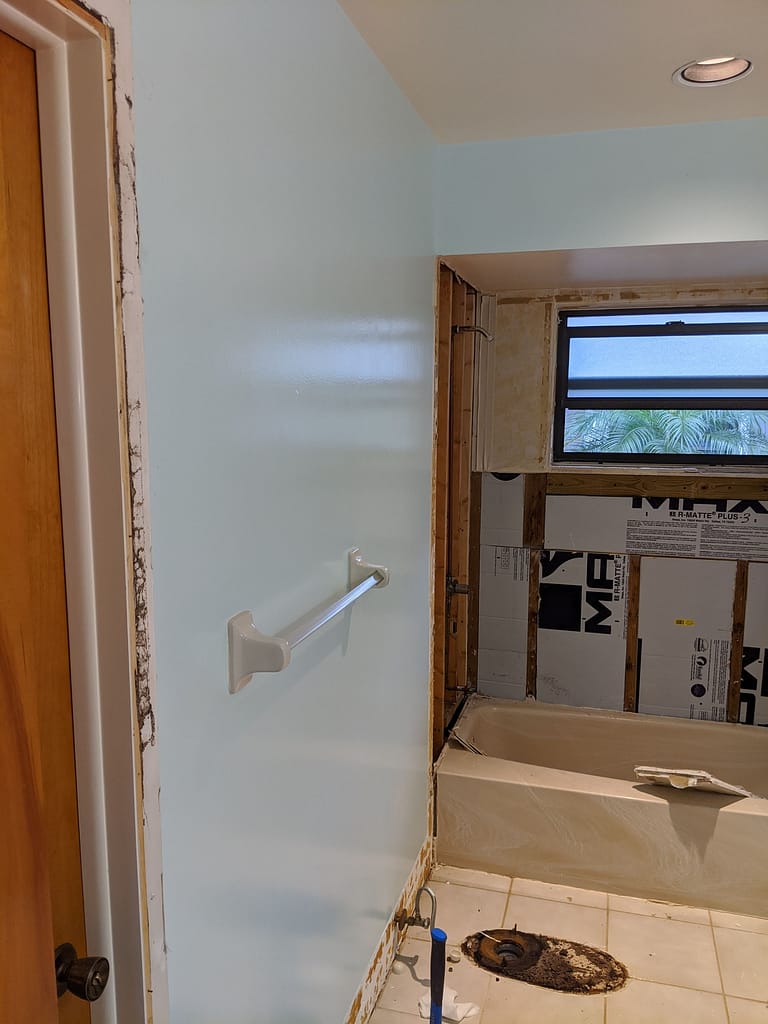
Demolition was very quick. I think I had it all done before Monday, except for the bathtub. As I suspected, a “Bath Fitter” or other similar solution was used to cover up a cast iron bathtub. Don’t worry, I had help getting the bathtub out. A giant sledgehammer, some solid swings, and it was ready to remove in pieces. Helpful tip: Bagster is the best!
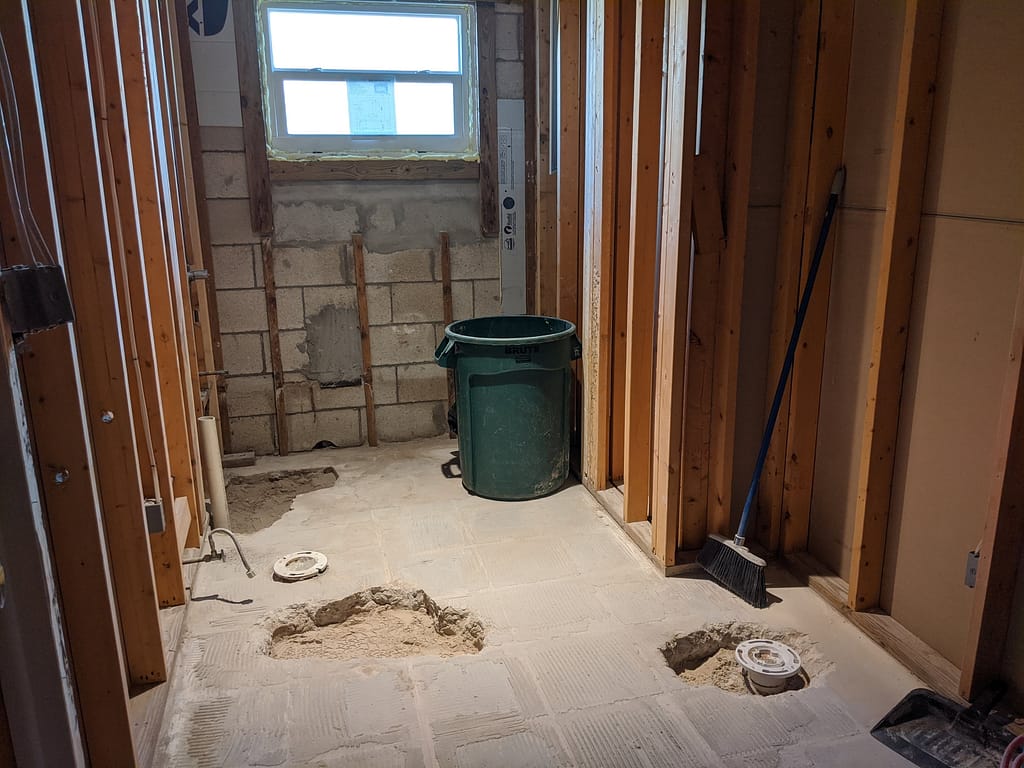
Once I got it down to studs and subfloor, I could see where the plumbing was and started to think about options. I’m not sure how I came up with the plan, but I decided to move the storage to the hallway and build a wall behind it. This gave me a little area for the sink and toilet, and space to add a whirlpool tub in the “nook” where the old tub and shower were. With these rough plans, I embarked on what turned out to be a 3+ year journey. I would recommend having more of a plan before you start. At least understand what you want for finishes and furniture. I was able to stay 1-4 steps ahead of myself and didn’t run into any major problems. For the next bathroom, I’m definitely going to have a more complete plan before I start. What also didn’t help was trying to build with crazy supply chain problems and insane prices. I did my best to work around the economy. I did have a contractor do 4 things: run the copper pipes for the tub, shower, and toilet, as well as move the toilet drain, add in electrical breakers and run the wiring to the bathroom, install the bathtub. The cost of this labor was $3,550. However, the bathtub was installed incorrectly so I had to remove it and reinstall it myself (with the help of a friend). The total cost of all parts was $11,335.81. This mostly does not include tax, but sometimes it does… hey, I wasn’t that picky recording it! This includes nearly everything, such as screws and glues. I’ll detail the “big ticket” items here:
- Whirlpool tub, upgrades (heater, low water sensor, LED light, cable drain), and delivery: $2,267
- New window: $238
- Shower hardware: $1769.63
- Ikea Billy Bookcase: $210.49
- Sink Faucet and drain: $130.95
- Light above vanity: $166.61
- Vanity, included sink/countertop, and mirror I did not use & upgraded handles: $299 & $31.92
- Toto Aquia IV washlet+ s550e one-piece toilet: $2265.73
- Ikea Hemnes over-toilet cabinet & upgraded handles: $199.99 & $4
- Flooring and underlayment: $385.72
I mean it when I say I do most of the work by myself, but there are times I need another set of hands or some extra muscle. I want to shout out my helpers, those who pitched in with physical labor or helped with ideas: Brendan, Mark, Richard, Taylor, Dennis, Yves, Dani, John, Joe, Logan, & Austin.
Before
During Pictures


The After Pictures


One response to “The Bathroom is Done.”
Cool! Good job 🙂